
บทความนี้เป็นการสอนการแบ่งหน้า(Pagination) โดยใช้ Library ของ Codeigniter ซึ่งการแบ่งหน้าเป็นสิ่งหนึ่งที่จำเป็นต้องมีในเว็บแอพลิเคชั่น ซึ่งก็แล้วแต่เทคนิคและลักษณะกันไป ประโยชน์ของการแบ่งหน้าช่วยให้หน้าเว็บไซต์ของเราไม่ยืดยาวและโหลดเร็วขึ้น แน่นอนว่าสำหรับบทความนี้ จะสอนแบบอธิบายให้เข้าใจง่ายๆ นะครับ มาเริ่มกันเลยครับ
เตรียมความพร้อม!
1. PHP เวอร์ชั่น 5.6
2. MySQL เวอร์ชั่น 5.6
3. Tool PHP MyAdmin
4. Codeigniter Framework เวอร์ชั่น 3.0.4
5. Editor ในตัวอย่างบทความนี้ผมใช้ Atom 1.0 นะครับ
วิธีการ/ขั้นตอน
Import SQL
Import ตารางข้อมูล Product ก่อน Code SQL ด้านล่างนี้ครับ
|
1 2 3 4 5 6 7 8 9 10 11 12 13 14 15 16 17 18 19 20 21 22 23 24 25 26 27 28 29 30 31 32 33 34 35 36 37 38 39 40 41 42 43 44 45 46 47 48 49 50 51 52 53 54 55 56 57 58 59 |
-- -- Table structure for table `products` -- CREATE TABLE IF NOT EXISTS `products` ( `id` int(11) NOT NULL, `name` varchar(100) COLLATE utf8_unicode_ci NOT NULL, `price` decimal(8,2) NOT NULL, `status` tinyint(1) NOT NULL DEFAULT '1' ) ENGINE=InnoDB AUTO_INCREMENT=24 DEFAULT CHARSET=utf8 COLLATE=utf8_unicode_ci; -- -- Dumping data for table `products` -- INSERT INTO `products` (`id`, `name`, `price`, `status`) VALUES (1, 'iPhone 6 Plus', '25000.00', 1), (2, 'iPhone 6', '22000.00', 1), (3, 'True SMART 4.0', '5000.00', 1), (4, 'Samsung Galaxy ALPHA', '12000.00', 1), (5, 'Samsung Galaxy Note', '23000.00', 1), (6, 'iPhone 5S', '20000.00', 1), (7, 'Samsung Galaxy S5', '20000.00', 1), (8, 'Galaxy K Zoom 3G', '21000.00', 1), (9, 'OPPO Joy Plus', '4500.00', 1), (10, 'Galaxy S DUOS 2', '3900.00', 1), (11, 'OPPO Joy Plus', '3490.00', 1), (12, 'Huawei Alek 4G', '5460.00', 1), (13, 'Huawei P8 Lite', '7900.00', 1), (14, 'OPPO N1 Mini', '9900.00', 1), (15, 'Samsung Galaxy E7', '11500.00', 1), (16, 'LG G4', '22900.00', 1), (17, 'i-Mobile IQ X Lucus', '5900.00', 1), (18, 'i-mobile I-Style 8.3', '4990.00', 1), (19, 'I-Mobile I-Style 210', '2490.00', 1), (20, 'i-mobile IQ 5.7', '4490.00', 1), (21, 'Galaxy Win 4.7', '7900.00', 1), (22, 'Galaxy Note 3 LTE', '19900.00', 1), (23, 'Nokia Lumia 630', '4990.00', 1); -- -- Indexes for dumped tables -- -- -- Indexes for table `products` -- ALTER TABLE `products` ADD PRIMARY KEY (`id`); -- -- AUTO_INCREMENT for dumped tables -- -- -- AUTO_INCREMENT for table `products` -- ALTER TABLE `products` MODIFY `id` int(11) NOT NULL AUTO_INCREMENT,AUTO_INCREMENT=24; |
Model
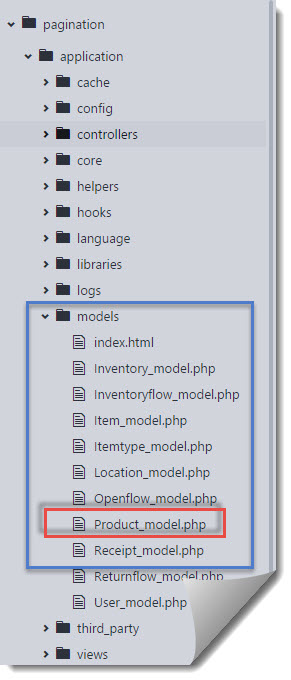
เริ่มเขียน Code ในส่วนของ Model ตามตัวอย่างนี้ผมสร้างไฟล์ชื่อ Product_model.php ไว้ใน [ชื่อโปรเจค]\Application\models\Product_model.php ตามรูปภาพด้านล่าง
สร้างไฟล์จากนั้นนำ code ไปใส่ในไฟล์นี้ครับ
|
1 2 3 4 5 6 7 8 9 10 11 12 13 14 15 16 17 18 19 20 21 22 23 |
<?php class Product_model extends CI_Model{ public function __construct(){ parent::__construct(); } public function record_count(){ return $this->db->count_all("products"); } public function fetch_product($limit, $start) { $this->db->limit($limit, $start); $query = $this->db->get("products"); if ($query->num_rows() > 0) { foreach ($query->result() as $row) { $data[] = $row; } return $data; } return false; } } |
จากตัวอย่าง code ด้านบนเป็นการใช้งาน Active Record เพื่อค้นหาจำนวนแถวทั้งหมด และดึงข้อมูลจากตาราง products
เมธอด record_count() ทำหน้าที่ return ค่า จำนวนแถวทั้งหมดกลับไปยัง Controller เพื่อนำไปใช้กับ $config[‘total_rows’] ซึ่งเป็น Library pagination
เมธอด fetch_product() ทำหน้าที่ดึงข้อมูลทั้งหมดจากตาราง products โดยมี arguments รับค่า 2 ค่าเข้าไปซึ่งเป็น $limit และ $start ถูกส่งโดย controller อีกที
Controller
เริ่มเขียน Controller ให้สร้างไฟล์ Product.php ไว้ใน [ชื่อโปรเจค]\Application\controllers\Product.php ตามรูปภาพด้านล่าง

สร้างไฟล์เสร็จแล้ว ให้นำ code ด้านล่างไปใส่
|
1 2 3 4 5 6 7 8 9 10 11 12 13 14 15 16 17 18 19 20 21 22 23 24 25 |
<?php defined('BASEPATH') OR exit('No direct script access allowed'); class Product extends CI_Controller{ public function __construct(){ parent::__construct(); $this->load->model("Product_model"); $this->load->library("pagination"); } public function index(){ $config = array(); $config["base_url"] = base_url() . "product/index"; $config["total_rows"] = $this->Product_model->record_count(); $config["per_page"] = 10; $config["uri_segment"] = 3; $this->pagination->initialize($config); $page = ($this->uri->segment(3)) ? $this->uri->segment(3) : 0; $data["results"] = $this->Product_model-> fetch_product($config["per_page"], $page); $data["links"] = $this->pagination->create_links(); $this->load->view("product", $data); } } |
เริ่มต้น code ในส่วนของ construct() ผมให้ทำการโหลด model ที่ทำการเขียนขึ้นมาเมื่อสักครู่กับโหลด library pagination ขึ้นมาใช้งาน (สามารถตั้งเป็น auto load ได้แต่ต้องไปตั้งค่าที่ config แทน)
เมธอด index() ในส่วน code ทำการตั้งค่าในตัวแปร $config โดยนำข้อมูลจาก code model บางส่วน
$config[“total_rows”] หมายถึง จำนวนข้อมูลทั้งหมด
$config[“per_page”] หมายถึงจำนวนข้อมูลแถวต่อ 1 หน้าที่ให้แสดงผล
$config[“uri_segment”] หมายถึง ตั้งค่าให้ตัวเลขหน้าอยู่ตำแหน่งพารามิเตอร์ไหนของ URL
และสุดท้ายหลังจากนั้นให้เราใช้งานเมธอด create_links() ใน View ซึ่งคำสั่งนี้จะทำการแสดงผล pagination
View
สำหรับ view ให้เราทำการสร้างไฟล์ product.php ไว้ใน [ชื่อโปรเจค]\Application\views\product.php ตามรูปภาพด้านล่าง

สร้างไฟล์แล้วให้นำ code ด้านล่างใส่
|
1 2 3 4 5 6 7 8 9 10 11 12 13 14 15 16 17 18 19 20 21 22 23 24 25 26 27 28 29 30 31 32 33 34 35 36 37 38 39 40 41 42 43 44 45 46 47 48 49 50 51 52 53 |
<!DOCTYPE html> <html> <head> <meta charset="UTF-8"> <title>itOffside.com CodeIgniter Pagination</title> <style type="text/css"> a { color: #003399; background-color: transparent; font-weight: normal; margin: 3px; border: 1px solid #000000; padding: 2px; } h1 { color: #444; background-color: transparent; border-bottom: 1px solid #D0D0D0; font-size: 19px; font-weight: normal; margin: 0 0 14px 0; padding: 14px 15px 10px 15px; } #container { margin: 10px; border: 1px solid #D0D0D0; box-shadow: 0 0 8px #D0D0D0; padding: 5px; } p { margin: 12px 15px 12px 15px; } </style> </head> <body style="margin-top: 10px;"> <div id="container"> <h1>Product</h1> <div id="body"> <?php foreach($results as $data) { echo "{" . $data->id . "}" . $data->name . " - " . $data->price . "<br>"; } ?> <p><?php echo $links; ?></p> </div> <p class="footer">Page rendered in <strong>{elapsed_time}</strong> seconds</p> </div> </body> </html> |
Result
ดูผลลัพธ์ เมื่อเข้ามาที่ลิงค์ http:\\localhost\pagination\product\index
สรุป
บทความนี้ทำให้เราสามารถทำการแบ่งหน้าได้โดยใช้ Library ของ Codeigniter แบบพื้นฐาน ซึ่งถ้าเราต้องการตั้งค่ามากกว่านี้ เช่น ต้องการกำหนด class css /tag html / ซ่อนลิงค์กรณีที่ข้อมูลมีหน้าเดียว เป็นต้น ให้เราเข้าไปอ่านได้ที่ Document ของเว็บหลักได้ Pagination Codeigniter
สำหรับบทความนี้หากมีใครสงสัยหรือติดปัญหา comment ไว้ด้านล่างครับ.

