 itOffside
การส่งอีเมล์ด้วย PHPMailer (โดยส่งผ่านอีเมล์ Gmail SMTP)
PHP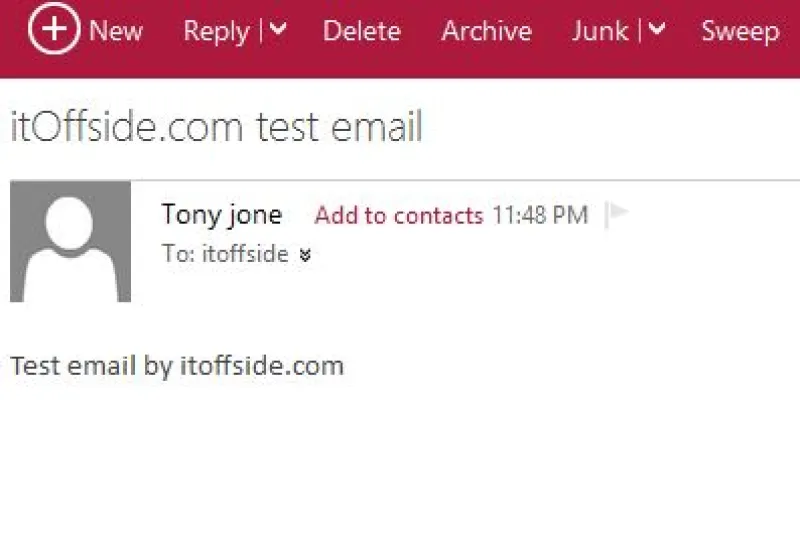
PHPMailer เป็น Class ที่ถูกพัฒนาขึ้นในการส่งอีเมล์ เพื่อความสะดวกสบายในการเรียกใช้งานซึ่งโดยปกติทาง PHP มีฟังก์ชั่นการส่งอีเมล์คือ mail() แต่ติดปัญหาคือเมล์ที่ส่งไปนั้นไม่ได้รับเนื่องจากอีเมล์ฉบับนั้นอยู่ใน Junkmail จึงทำให้รับความลำบากในการแก้ไขปัญหา ดังนั้น การใช้งาน PHPMailer จึงเป็นทางเลือกหนึ่งในการแก้ไขปัญหาและ อีกทั้ง PHPMailer สามารถใช้งานได้ง่ายหากให้ gmail.com ในการส่งอีเมล์ โดยตัวอย่างบทความใช้ gmail SMTP
สำหรับ PHPMailer คุณสามารถดาวน์โหลดได้ที่ คลิกที่นี้เพื่อดาวน์โหลด
เว็บหลักของ PHPMailer https://github.com/PHPMailer/
การติดตั้ง
1. หลังจากดาวน์โหลดมาแล้วให้ทำการแตกไฟล์ออกจะได้โฟล์เดอร์ PHPMailer
2. Copy โฟล์เดอร์ PHPMailer มาไว้ในโปรเจคของคุณ
การใช้งาน
1. สร้างไฟล์ขึ้นมาหนึ่งไฟล์เพื่อทำการส่งอีเมล์ในตัวอย่างนี้สร้างไฟล์ชื่อ send.php แล้วให้คุณนำ code ที่ผมเขียนไปวางใส่
 <?php
/**
 * This example shows making an SMTP connection with authentication.
 */

//SMTP needs accurate times, and the PHP time zone MUST be set
//This should be done in your php.ini, but this is how to do it if you don't have access to that
date_default_timezone_set('Asia/Bangkok');

require 'PHPMailer/PHPMailerAutoload.php';

//Create a new PHPMailer instance
$mail = new PHPMailer;
//Tell PHPMailer to use SMTP
$mail->isSMTP();
//Enable SMTP debugging
// 0 = off (for production use)
// 1 = client messages
// 2 = client and server messages
$mail->SMTPDebug = 0;
//Ask for HTML-friendly debug output
$mail->Debugoutput = 'html';
//Set the hostname of the mail server
$mail->Host = "smtp.gmail.com";
//Set the SMTP port number - likely to be 25, 465 or 587
$mail->Port = 587;
//Set the encryption system to use - ssl (deprecated) or tls
$mail->SMTPSecure = 'tls';
//Whether to use SMTP authentication
$mail->SMTPAuth = true;
//Username to use for SMTP authentication
$mail->Username = "your@gmail.com";
//Password to use for SMTP authentication
$mail->Password = "yourpassword";
//Set who the message is to be sent from
$mail->setFrom('your@gmail.com', 'Tony jone');
//Set who the message is to be sent to
$mail->addAddress('test@itoffside.com', 'itoffside');
//Set the subject line
$mail->Subject = 'itOffside.com test email';
//Read an HTML message body from an external file, convert referenced images to embedded,
//convert HTML into a basic plain-text alternative body
//$mail->msgHTML(file_get_contents('content.html'), dirname(__FILE__));
$mail->msgHTML("Test email by itoffside.com");

//send the message, check for errors
if (!$mail->send()) {
    echo "Mailer Error: " . $mail->ErrorInfo;
} else {
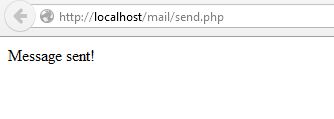
    echo "Message sent!";
}
ความหมายแต่ละฟังก์ชั่นการทำการที่สำคัญ
require 'PHPMailer/PHPMailerAutoload.php';ทำการเรียกหาไฟล์ PHPMailerAutoload.php เพื่อใช้ฟังก์ชั่นส่งอีเมล์
$mail->SMTPDebug = 0; คือต้องการ debug หรือไม่หากไม่ใส่ 0
$mail->Host = "smtp.gmail.com"; คือ ค่า smtp ที่คุณจะต้องใส่หากส่งโดย gmail ให้ใส่ตามตัวอย่างส่วน hotmail ผมยังไม่ได้ทดสอบ
$mail->Port = 587; คือ เลขพอร์ทของอีเมล์ หากส่งโดย gmail ให้ใส่ตามตัวอย่าง
$mail->Username = "yourmail@gmail.com";? ชื่ออีเมล์ที่จะส่ง(แนะนำให้ใช้ gmail)
$mail->Password = "yourpassword"; รหัสผ่านที่ใช้ในการเข้าอีเมล์ของคุณ
$mail->setFrom('tangeaim.ball@gmail.com', 'Tony jone'); ใส่ชื่ออีเมล์คุณและชื่อ นามสกุลคุณตามตัวอย่าง
$mail->addAddress('xxxxxxx@hotmail.com', 'itoffside'); ใส่ชื่ออีเมล์ที่รับและชื่อ นามสกุลของคนที่รับอีเมล์
$mail->Subject = 'itOffside.com test email'; ชื่อเรื่องของอีเมล์
$mail->msgHTML("Test email by itoffside.com"); ข้อความอีเมล์
*หมายเหตุหากต้องการข้อความที่เป็น html ให้เปลี่ยนเป็นดังนี้ $mail->msgHTML(file_get_contents('content.html'), dirname(__FILE__));
//send the message, check for errors
if (!$mail->send()) {
echo "Mailer Error: " . $mail->ErrorInfo;
} else {
echo "Message sent!";
}
แสดงผลการส่งอีเมล์ (หากส่งสำเร็จส่งข้อความ Message sent!)
ผลลัพธ์
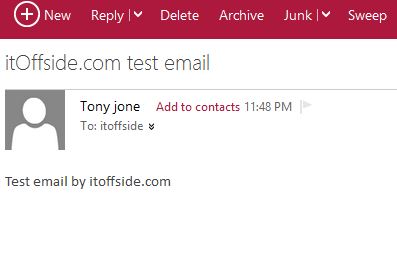
ได้รับอีเมล์ที่ส่งมาจาก code PHPMailer
สำหรับบทความนี้ก็จบแล้ว การใช้งาน PHPMailer นั้นใช้งานง่ายมีฟังก์ชั่นในการใช้งานมาให้แล้วเพียงแต่คุณต้องนำค่ามาใส่ให้ถูกต้องเท่านั้นและในตัวอย่างบทความนี้ เป็นการใช้งานพื้นฐานซึ่ง PHPMailer มีความสามารถมากมายให้ผู้ใช้งานได้ทดสอบ เช่น การส่งอีเมล์แนบไฟล์รูป เป็นต้น หวังว่าผู้อ่านทุกคนคงได้รับประโยชน์ไม่มากก็น้อยครับ หากมีคำถามให้เขียน comment ด้านล่างได้เลยครับ หากชอบก็กดแชร์และกด Like ได้ครับ ขอบคุณครับ
แชร์บทความนี้
โปรแกรมเมอร์
ความเห็น (26)